Login via Browser/ URL
- Use your computer system and open any browser such as Chrome, Mozilla, or Bing.
- For the second step, run this IP 192.168.1.1 in the browser or search for Orbi login for further continuation.
- The Orbi Login window must have flashed on your screen.
- Time to set up your username and password. You are good to go now. You have successfully logged into the Orbi satellite and router system.
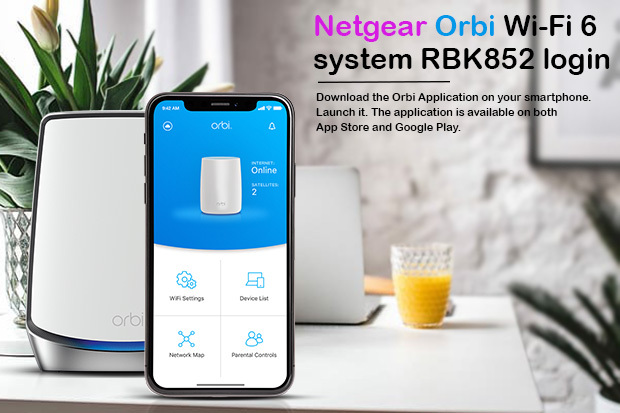
Login via Orbi App
- Download the Orbi Application on your smartphone. Launch it. The application is available on both App Store and Google Play.
- App Store – https://apps.apple.com/us/app/netgear-orbi-wifi-system-app/id1182184397
- Google Play – https://play.google.com/store/apps/details?id=com.dragonflow.android.orbi&hl=en_IN&gl=US
- As of now, you must have installed the application.
- For the third step, open the app, and a login page will flash on the screen.
- The page will ask for Orbi router login details. Enter them.
- Sign in for the completion of the process.
Login via Router
- Connect the newly bought Orbi router to the modem with an Ethernet cable because that’s the easiest way to do it.
- Time to turn on the computer system, be it desktop or laptop.
- Run this IP 192.168.1.1 into the browser or just search for Orbi login in the search bar.
- As the login window flashes on your screen, make sure to fill in the credentials for a successful login.
We are hoping that you have successfully logged into your Orbi Netgear account for further setup of the NETGEAR Orbi Wi-Fi 6 System RBK852. We are proceeding further to the setup.
Netgear Orbi Wi-Fi 6 System RBK852 setup
Finally, to the setup of this high-speed tri-band Wi-Fi system. Read the instructions carefully for a proper and successful setup of the mesh Wi-Fi network system. Everything matters from LED indicators to the setting up of SSIDs. Buckle up for the further steps, but before that, learn the lights that LED indicators are blinking on the Orbi satellite.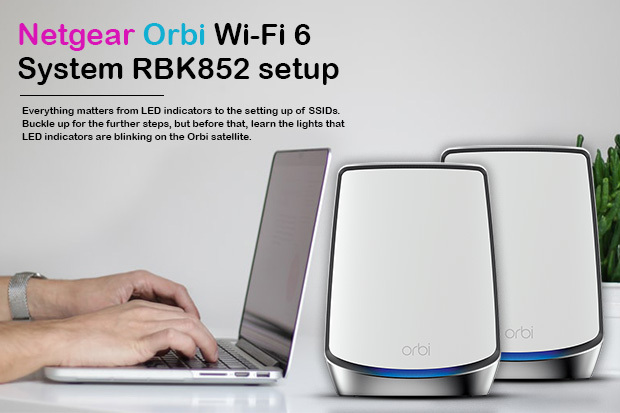
Orbi Satellite LED Indicators on Front
- Solid Green – Power ON
- Solid Amber – Orbi satellite is booting.
- Blinking Amber – Firmware being resettled to factory default settings.
- Blinking Red – Corrupted/ Pirated Firmware
- No Light – No Power Supply
Orbi Satellite LED Indicators on Back
- Pulsing White – The booting process is on.
- Blue – The Blue LED indicator light stays on for three minutes and then turns off – it symbolizes the good connection between satellite and router.
- Amber – The Amber LED indicator stays on for three minutes and then turns off – it symbolizes an average connection between satellite and router and can be improved.
- Magenta – Syncing failed between satellite and router.
- No Light – Work is done, and the satellite has synced with the router successfully.
FOCUS HERE – There are Three Devices; one – your home router/ modem, two – the Orbi satellite, and three – the Orbi router. Time to set up the connection between the three.
Connect the router
- The very first step, power on the Orbi router and connect it to your home modem.
- Unplug the modem from the power source and if there is any battery in it – take it out. Let the modem only be connected to the wall jack for internet service.
- Time to shoot power again in your modem; if it runs on battery, insert the battery again.
- Use an Ethernet cable to establish a connection between your home modem and the Orbi router.
- Plug in the power adapter to a power socket and then to the router.
- The LED indicator of power on the router will blaze. If it does not, then make sure that the adapter is in the socket or power outlet properly.
Sync Orbi Satellite and Orbi Router
- Place the Orbi Satellite within the range of the Orbi router’s Wi-Fi networks. This will help in syncing devices properly. Please keep them in a closed periphery.
- Time to give some power to the satellite. Connect it to a power socket.
- The LED indicator of the satellite will go pulsing or blinking white. The Orbi satellite will automatically look for the router’s signal to sync both devices.
- Make sure the colour of the indicator on the back goes blue, not amber. If it is amber then, bring the satellite closer to the Orbi router.
- Check for the LED indicator light again. If the indicator turns magenta then, bring the satellite closer to the router. In case the light turns off or does not turn blue, amber, or magenta, then my dear friend press the sync button on the back of the router.
- Within two minutes, press the sync button of the satellite too.
- For the last step, wait till the LED indicator turns blue or amber.
Connect to the Network
Let’s go access the router by connecting it to the Wi-Fi networks. There are the following ways in which the connection can be formulated
- Wired Connection
- Wi-Fi Method
- WPS (Wi-Fi Protected Setup) method
Opt for the one that suits you best, and jump on to the final stages of setup.
Orbi RBK852 setup wired method
- Look if the router is receiving appropriate power. Check the power/ ON-OFF LED indicator.
- Time to connect an Ethernet cable to your computer’s Ethernet port.
- Another end of the Ethernet cable has to be attached to the Orbi Wi-Fi router.
- A message of successful connection will be displayed on your computer’s screen. LAN connection established.
Orbi RBK852 setup Wireless method
- Power on either the router or the Orbi satellite.
- Go to the Wi-Fi settings of your phone or of the computer system.
- Check for the Wi-Fi network name in the Wi-Fi network connection settings. You may find the name of the Wi-Fi network on the router label.
- Network name defaults same for the router and for the satellite. You are just making your work easy.
- Join the network whose name you found on the router label box.
- Enter the password. Password is also mentioned on the router label box.
Orbi Wi-Fi 6 System RBK852 setup WPS method
The easiest of all methods listed here is the Wi-Fi Protected Setup method. Follow the steps for the setup of the Orbi Wi-Fi 6 system.
- Power on the Orbi router.
- Search WPS instructions on your system for further proceedings.
- Time to press that sync button on the router.
- Press the WPS button on your modem or home router, so both the devices can sync. Make sure to do it within two minutes.
This is it. Now you must have successfully settled up and logged in to your Netgear Orbi W-Fi 6 system RBK852. Congratulations on that. Even if there are any issues or problems in following these steps – feel free to contact our team with zero hesitation. We are here to help you.